
How to Clean AirPods Safely: The Ultimate 5-Minute Guide to Better Sound
You wear your AirPods everywhere. For instance, they join you at the gym. They also sit in your ears during long commutes. Over time, earwax and grime inevitably build up. This buildup eventually ruins your sound quality. Consequently, it also looks quite gross. Therefore, you must clean them regularly to protect your investment.
Cleaning electronics feels intimidating. Specifically, you worry about liquid damage. You might also fear scratching the delicate mesh. However, you can master this process easily. Simply follow this guide to make your earbuds shine like new.
Gather Your Cleaning Supplies
First, do not grab random household cleaners. For example, bleach will damage the plastic finish. Furthermore, excess water will fry the internal circuits. Instead, you need specific, gentle tools for this job.
Essential Toolkit:
- 70% isopropyl alcohol wipes.
- A dry, lint-free microfiber cloth.
- Fine-tipped wooden toothpicks.
- A clean, soft-bristled toothbrush.
- Cotton swabs (Q-tips).
- Adhesive putty (like Blue Tack).
Step 1: Clean the External Stems
To begin, start with the outer surfaces first. Grab your dry microfiber cloth. Then, wipe down the white plastic stems thoroughly. This effectively removes oils from your skin.
If you see stubborn stains, use an alcohol wipe. However, ensure the wipe is not dripping wet. Squeeze it out if necessary. Meanwhile, avoid the speaker mesh during this step. Rub the plastic gently until the marks disappear. Finally, use the dry part of the cloth to finish. This prevents any streaks from forming.
Step 2: Tackle the Speaker Mesh
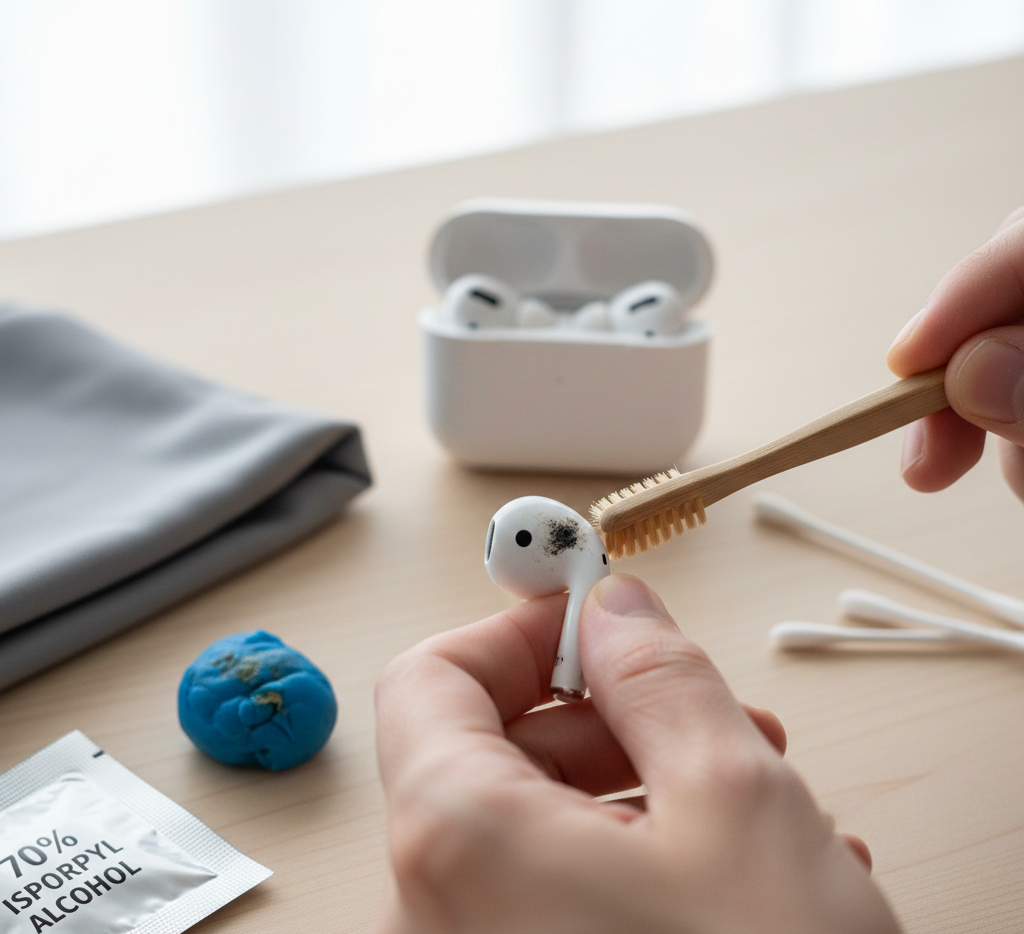
Next, focus on the mesh. The mesh is the most sensitive part. This area usually catches the most earwax. Therefore, never use sharp metal objects here. For instance, a safety pin can puncture the delicate screen.
Instead, take your dry toothbrush. Brush the mesh very gently. Simultaneously, hold the AirPod with the mesh facing down. This allows gravity to pull debris out. Do not push the bristles inward. Rather, you want to flick the wax away.
In addition, try the adhesive putty method. Warm a small piece of putty in your hands. Then, press it lightly against the mesh. Pull it away quickly. As a result, the wax should stick to the putty. Repeat this until the holes look clear.
Step 3: Deep Clean the Silicone Tips
Furthermore, AirPods Pro users have an extra step. You must remove the silicone ear tips. Pull them firmly off the earbud body. Afterward, rinse the tips with plain water. Do not use soap or harsh chemicals.
Dry them completely with your microfiber cloth. Any moisture inside the tip will cause problems. Hence, let them air dry for ten minutes. Meanwhile, clean the black mesh on the earbud itself. Use a dry cotton swab for this area. Once the tips are dry, click them back on. Consequently, you will hear a satisfying snap.
Step 4: Sanitize the Charging Case
Additionally, your charging case stays in your pocket. It collects lint and dust constantly. Consequently, the interior gets filthy fast.
Open the lid and look inside. Use your dry toothbrush for the hinge. Dust often hides in those tight crevices. For the charging contacts, use a dry cotton swab. However, be very careful at the bottom. Do not apply pressure to the metal pins. Otherwise, if they bend, your AirPods won’t charge.
If the case has scuffs, use the alcohol wipe. Wipe the exterior and the interior plastic. Similarly, avoid getting liquid in the charging ports. Use a toothpick to scrape gunk from the seams. Now, your case should look pristine.
What to Avoid at All Costs
On the other hand, mistakes can lead to permanent damage. Never submerge your AirPods in any liquid. Although they are water-resistant, they are not waterproof.
Avoid using compressed air cans. The high pressure can dislodge the internal components. Moreover, it often pushes wax deeper into the device. Furthermore, stay away from paper towels. They are surprisingly abrasive and scratch plastic. Instead, stick to microfiber for the best results.
Maintenance Tips for Longevity
To maintain quality, clean your earbuds at least once a week. Frequent light cleanings prevent heavy buildup. This habit also keeps the sound crisp and clear.
Wipe your ears before inserting the buds. This simple act reduces wax transfer significantly. Also, keep your charging case closed when empty. Consequently, this stops dust from entering the charging wells.
Summary Checklist
| Part | Tool | Action |
| Plastic Body | Microfiber Cloth | Wipe and buff |
| Speaker Mesh | Soft Brush / Putty | Flick or lift debris |
| Silicone Tips | Water | Rinse and dry |
| Charging Pins | Dry Cotton Swab | Gentle dusting |
| Tight Seams | Wooden Toothpick | Careful scraping |
Final Thoughts on Earbud Hygiene
Ultimately, clean earbuds protect your hearing health. Bacteria thrive on dirty silicone and plastic. This can lead to painful ear infections. Moreover, clean mesh ensures the best frequency response. Thus, you will hear every detail in your music.
Take ten minutes tonight to do this. Your ears will certainly thank you. Your AirPods will last much longer too. Now, enjoy your favorite playlist with perfect clarity.
Leave a Reply