
How to Clean a Mattress and Remove Yellow Stains (Easy DIY Guide)
You spend roughly one-third of your life on your mattress. Most people wash their sheets every week. However, many folks completely ignore the mattress itself. Sweat and skin cells seep through your bedding over time. These fluids create those unsightly yellow patches you see today.
Cleaning a mattress feels like a daunting chore. You cannot simply throw it into a washing machine. Furthermore, you cannot soak it with a garden hose. Excess moisture traps deep inside the foam or springs. Consequently, this dampness leads to dangerous mold and mildew growth.
Fortunately, you can restore your bed with simple household items. This guide covers deep cleaning and stain removal step-by-step. You will breathe easier and sleep better tonight.
Gather Your Cleaning Supplies
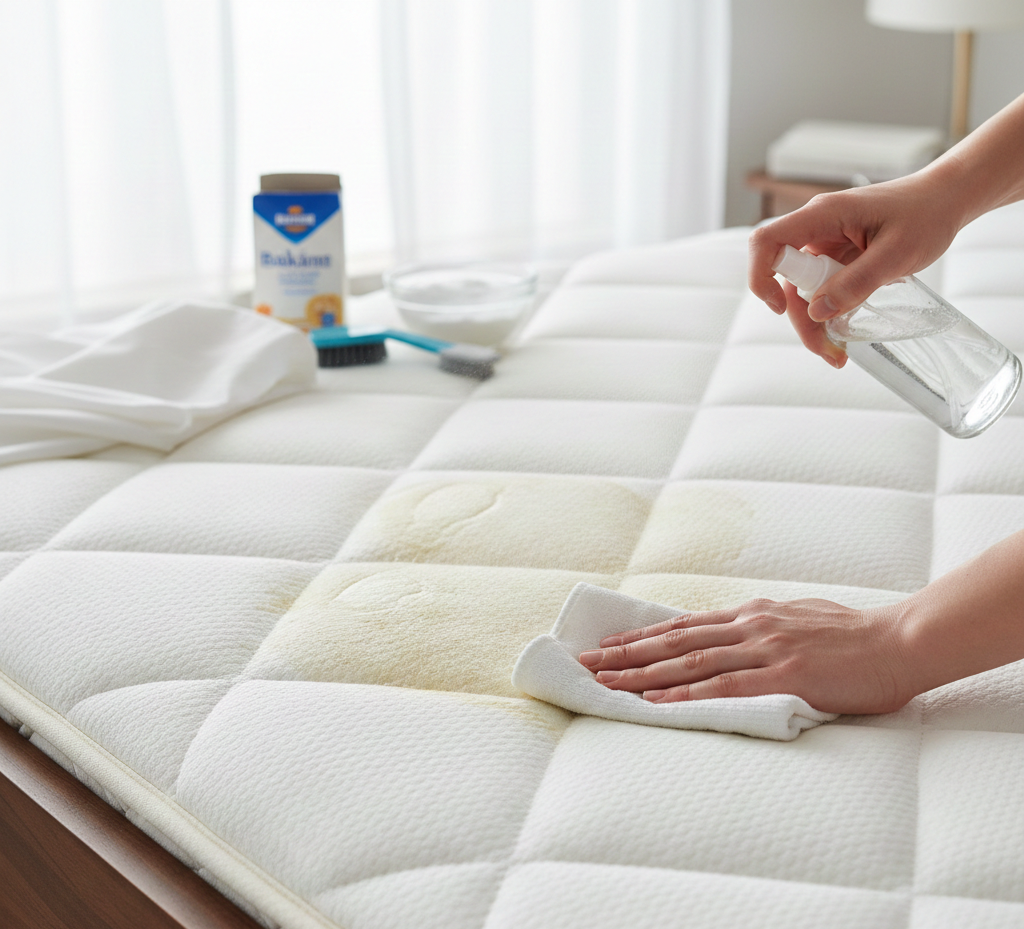
Before you start, gather everything in one place. You do not want to hunt for tools mid-clean. Actually, most of these items probably sit in your pantry already.
- A powerful vacuum with an upholstery attachment.
- Baking soda to neutralize stubborn odors.
- Dish soap for breaking down body oils.
- Hydrogen peroxide to bleach out yellowing.
- A spray bottle for even liquid application.
- Microfiber cloths for blotting and scrubbing.
- Cold water to prevent setting protein stains.
Step 1: Strip the Bed Completely
First, remove every piece of bedding from the frame. This includes sheets, pillowcases, and your mattress protector. Toss these items into the laundry immediately. In addition, use the hottest water setting allowed. High heat kills dust mites and bacteria effectively.
Next, check your pillows for any yellowing or odors. Many pillows can go into the wash as well. Ensure the mattress surface remains totally bare for the next steps.
Step 2: Vacuum the Surface Thoroughly
Dust mites love to hide in the seams. Therefore, you must use your vacuum’s upholstery tool. Start at the top and work your way down. Run the vacuum over every square inch of the fabric. Specifically, pay close attention to the quilted grooves and side rolls.
Moreover, flip the mattress if it is a double-sided model. Vacuum the underside to remove hidden dust and pet hair. This step removes the loose debris that causes friction wear.
Step 3: Deodorize with Baking Soda
Mattresses soak up odors like a giant sponge. Sweat and oils create a stale scent over time. To fix this, sprinkle a thick layer of baking soda everywhere. Use an entire box if you have a king-sized bed.
In the meantime, rub the powder into the fabric with a dry brush. Let the baking soda sit for at least two hours. Ideally, leave it for a full twenty-four hours for best results. The powder draws out moisture and neutralizes acidic odors.
Step 4: Address the Yellow Stains
Yellow stains usually come from sweat, urine, or skin oils. As a result, these organic marks require a specific chemical reaction to lift. You can create a powerful “miracle cleaner” at home easily.
The DIY Cleaning Solution
Mix one cup of 3% hydrogen peroxide with three tablespoons of baking soda. Then, add two small drops of liquid dish soap. Swirl the mixture gently in a bowl or spray bottle. Do not shake it vigorously, or it will foam over.
Application Process
- Spray the solution lightly over the yellowed areas.
- Wait fifteen minutes for the peroxide to break down the proteins.
- Afterward, blot the area with a clean, dry microfiber cloth.
- Avoid scrubbing in circles, as this pushes the liquid deeper.
- Finally, repeat the process for particularly dark or old stains.
Because of this, the oxygen in the peroxide lifts the pigment to the surface. Your mattress should look significantly brighter after this treatment.
Step 5: Treat Tougher Biological Stains
Sometimes, standard peroxide isn’t enough for blood or urine. In these cases, you need an enzymatic cleaner. These cleaners contain “good” bacteria that eat organic waste. Luckily, you can find these in the pet aisle of most stores.
Then, Spray the enzyme cleaner onto a cloth first. Next, press the cloth into the stain firmly. Let the enzymes work for about thirty minutes. Then, blot the spot with a damp cloth to rinse. This method prevents the smell from returning during humid weather.
Step 6: Vacuum One Final Time
Once the stains disappear, your baking soda might look clumpy. This happens because it absorbed the moisture and oils. Now, use your vacuum again to suck up all the residue. Ensure you clear every white particle from the fabric. As a result, your mattress should now look and smell like new.
Step 7: Let It Air Dry Completely
This is the most critical step in the entire process. Never put sheets back on a damp mattress. Indeed, trapped moisture creates a breeding ground for black mold. Instead, open the windows to increase airflow in the room.
Additionally, use a floor fan to speed up the drying. Point the fan directly at the damp spots you treated. If possible, let the mattress sit in direct sunlight. UV rays act as a natural disinfectant for fabric. Wait at least six to eight hours before re-dressing the bed.
How to Prevent Future Yellowing
Cleaning a mattress takes significant time and physical effort. Consequently, you should protect your hard work for the future.
Use a Waterproof Protector
Invest in a high-quality, breathable mattress protector. Specifically, look for one with a waterproof membrane. This layer stops sweat and spills from reaching the foam. Then, you can simply wash the protector once a month.
Rotate Your Mattress
Rotate your mattress 180 degrees every six months. By doing this, you prevent permanent body indentations from forming. It also ensures even wear across the entire sleeping surface.
Change Your Sheets Weekly
Dead skin cells feed dust mite populations. Therefore, wash your sheets every seven days to minimize this buildup. This habit keeps your mattress cleaner for much longer periods.
Summary Table: Quick Stain Guide
| Stain Type | Best Treatment | Action |
| Sweat/Yellowing | Peroxide + Baking Soda | Spray and blot |
| Blood | Cold Water + Salt | Blot immediately |
| Urine | Enzyme Cleaner | Soak and air dry |
| General Odor | Dry Baking Soda | Sift and vacuum |
Final Thoughts
A clean mattress improves your indoor air quality significantly. In short, you will stop sneezing and wake up feeling refreshed. Most people should perform this deep clean every six months. Ultimately, it extends the life of your expensive investment by years.
By following these steps, you eliminate bacteria and unsightly marks. You no longer have to feel embarrassed when changing your sheets. Instead, take control of your sleep environment starting this weekend. Your body will thank you for the extra care.
Leave a Reply